Monday, May 14, 2012

IX Encuentro Nacional Land Rover, Alcañiz

Well we did it again,
it was such a great event.

This time, we camped in one of the parking lots of Motorland, quite a racing complex they have there. Most of the stuff is related to superbikes and fast cars or go karts, so no interest there for me, but still quite impressive.

This is a view of the camping site where we stayed:

 Saturday, we started the day with a route around Alcañiz, pretty easy, but beautiful views everywhere, with maybe a couple spots where you had to pay attention, most of it, really easy and doable with a stock Land Rover.

 A group picture

 Our 95 Disco is doing great with the new mods, I had 0 problems or issues with it during the whole trip, and it was *HOT*, still no cooling issues at all.
Here are 2 shots where it's resting a bit...

 Picturesque surroundings
 After we finished the route, this is the view from the Motorland complex, this lake is very nice:

 Alcañiz is a charming village, it has many architectural features, this is just a sample, but for more info check here and here
 Sunday, we did the off-road courses both levels 1 (easy) and 2 (not that easy), going there, a view from the camping place.
 This was the start of the area 1, the easy one, this first descent was quite something:

 Waiting ....
 This is the drop you do, in just a handful of meters, very cool, your heart pumping....

 Showing off the new tires and suspension system :), this was the easy section.


 This is the middle difficulty section, not a single issue with all the flex done, no rubbing or suspension problems at all. My daughters had a lot of fun with this one.


 With some of our friends, one of the best things of this kind of event is meeting new people and getting to know better the friends you made in other editions.

 Walking grandpa' by the hand :) the series 109 of Tequila, did a superb job, it's exactly from the same year as mine 1977:


 Testing, the "waters" just a little bit...
 ... OK, let's dive in...

 ... TAKE OFF! :)
 So, which way is it??
 This is what Land Rovers is about, having fun with these machines, everyone on his or her own way, some of us enjoy fixing/upgrading them, wheeling them, helping others to learn, organizing events, ... you get the "big family" feeling whenever you go to one of this events... if you want to try it, join us, next year! We'll be there...


Tuesday, May 08, 2012

Spring and brake replacement

I am overhauling the brakes and replacing the springs and shock absorbers all around.

I thought I would take some pictures and write up a little about what I did so maybe others can find this info helpful.

For brake reference other than the manual, this site has all you need

I am doing as an example the rear right side (near side).

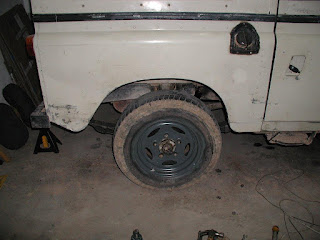
This is the starting point, everything very old and worn out.

 First I took out was the limiting strap, I am not going to put one in, I don't think is needed, specially if you don't plan to off-road the series too hard. Here you can see the sorry state it was in.

 No more rags :)
So how long is the strap?, well I don't care, but I see this question asked a lot, so here it is 84 cm. and I put some other pictures to see where the holes go


 After fighting with the old spring I took it out. Advice: leave the bolts on while wrestling your way with it, if you leave one side loose it's very hard to undo the other side.

 As you can see I leave the shock absorber for the last thing, as it helps a bit to hold the spring in position, just a bit, the original rear spring is *very* heavy.
 After a little clean up the new spring goes in, I put one side first and then I used a jack to hold the other end, while working my way with the bolt.
 Here you can see that the bolt/nuts and hole, don't align well. Don't panic.
 Here I use a hand winch (in the front I used an extra jack) to move slightly the axle so the hole and bolt gets centered.
 Make sure the bolt on the shock plate aligns too before even trying to do the U-bolts
 Well, spring & shock done, don't tighten too much everything, as it needs to be done when the car goes on the floor with the tire and everything.
Now is time to clean the brakes, first I disposed any dust (which can contain asbestos) in a safe zip bag, no blowing or vacuum cleaner should be used for this.
Then I used brake cleaner to get all the dirt down into a container, this way, there is no dust.


Remember, security first, second and third :)

 Here you can see the back plate after cutting with the grinder the adjuster

 All the brake bits go back, the springs are kind of tricky to get right, this is what I do: I place the shoe that has both springs first, I put the long one first, make sure it goes *behind* the adjuster.
Then I put the other spring, and get the other shoe (not yet on the round bottom end) put the spring and then I pull the shoe with the spring on until it goes in the round end on the bottom.

 And this is the final result
 Now it seems level, which hasn't been in a long time (back end was all the way down almost on the tops).